Showing posts with label Cookies. Show all posts

Thursday, February 14, 2013

Soft Sugar Cookies


Happy Valentine's Day everyone! I hope that everybody is taking the time to show the ones they love just how much they care :).

Whateverrrr.... frankly, I think it's kind of lame that people feel they need a *holiday* to express their love, because I'm pretty sure if you love someone you should show it everyday... but to each his own. And as I mentioned before, I'm a big fan of the copious amounts of candy and chocolate that I frequently receive on this holiday (*cough, from my Mother... whatever, don't judge), so I guess I'm OK with it. Somewhat.

Anyways, here are some nice soft sugar cookies that you can share with your significant other, family and/or friends. They're simple to make, and I like that it's a roll-out dough so you can choose whichever shape you want! Many of the recipes for soft sugar cookies I looked at are more drop-cookie style, so the fact that you can roll this one out was what drew me to it. However, I would make one slight adjustment to this recipe. Instead of using vanilla extract in the dough, I would swap it for almond. I doubled the amount of vanilla, and the cookies still came out somewhat plain. If they hadn't had the buttercream on top, they would have been too flavourless for my liking. But baking is about whatever you like, so you use whichever extract suits you!

Yield: just over 2 dozen
Ingredients:
3 cups all-purpose flour
1/2 teaspoon baking soda
1/2 teaspoon baking powder
1/4 teaspoon salt
1/2 cup unsalted butter, at room temperature
1 cup granulated sugar
2 large eggs
2 teaspoons almond OR vanilla extract
3/4 cup sour cream


For the Buttercream Frosting:
1/2 cup unsalted butter, room temperature
1 teaspoon vanilla extract
2-3 cups powdered sugar
Pinch of salt
2 tablespoons heavy cream

Food coloring, optional
Sprinkles, optional


Directions:
In a medium blow, whisk together the flour, baking soda, baking powder and salt; set aside.

In the bowl of a stand mixer, cream the butter and sugar together until light and fluffy. Add the eggs, one at a time, beating until just incorporated. Add the extract and sour cream and mix until just combined.

Add the dry ingredients and mix at low speed until the dough starts to form, scraping down the bowl as needed. The dough will be a little sticky; that is normal. Flatten the dough into a rectangle about 1 1/2 inches thick, then wrap in plastic wrap. Chill in the refrigerator for at least two hours, or overnight.

Preheat oven to 425 degrees F. Line baking sheets with parchment paper or Silpats; set aside.

Lightly flour the counter top and the top of the dough. Using a rolling pin, roll the dough out to about 1/4 inch thickness. Using desired cookie cutters, cut out the cookies and place on baking sheets. Bake for 7 minutes, or until cookies are just slightly golden around the edges. Immediately transfer cookies to a wire rack to cool. Cool completely before frosting.

To make the frosting, in the bowl of a stand mixer fitted with the paddle attachment, cream together the butter and vanilla extract. Slowly beat in powdered sugar and pinch of salt. Once smooth and creamy, add in heavy cream. If you don't have heavy cream, milk or normal cream works as well. Beat in 1 tablespoon at a time until the frosting reaches your desired consistency. Then beat at medium-high speed for a minute or two until the frosting is light and fluffy. If desired, add food coloring and mix until combined.

Once cookies are completely cooled, frost and decorate as desired. Allow the frosting to set (it will form a crust), then store in an air-tight container for up to 3 days (the cookies actually last longer, I've had mine for about a week, but they start to get a bit stale and just don't taste as good. They're definitely the best in the first two days.).

Source: Two Peas and Their Pod


If you're interested in other treats for Valentine's Day, check these out:
Whoo Do You Love? Sugar Cookies 
Red Velvet Cupcakes 
Strawberry Cupcakes 
Valentine's Day Sugar Cookies 


Pin It

Saturday, December 22, 2012

White Chocolate Topped Gingerbread Cookies


I don't have much to say about these cookies, other than that you can never, ever go wrong with soft, sugary gingerbread cookies. Soft gingerbread/molasses cookies are one of my favourites of all time, yet I hardly ever enjoy them! There's the very odd occasion that I purchase one of the ginormous ones from Starbuck's, but that likely equals once, maybe twice a year.

Simple. And perfect.


I halved the recipe and managed to get about 2 dozen. The ingredients shown below are for a full recipe, so I think it's safe to say it will produce somewhere around 4 dozen cookies.

Ingredients:
3 cups flour
2 teaspoons ginger
1 teaspoon cinnamon
1 teaspoon baking soda
1/4 teaspoon nutmeg
1/4 teaspoon salt
3/4 cup (1 1/2 sticks) unsalted butter, at room temperature
3/4 cup firmly packed brown sugar
1/2 cup molasses
1 egg
1/4 cup granulated sugar
1 teaspoon vanilla
3 oz. white chocolate

Directions:
Combine flour, ginger, cinammon, baking soda, nutmeg and salt in a medium bowl.

Using the paddle attachment on a stand mixer, beat butter and brown sugar on medium speed until light and fluffy. Add molasses, egg and vanilla, and beat well. Gradually beat in flour mixture on low speed until well combined.

Press dough in a thick flat disk and wrap in plastic wrap. Refrigerate 4 hours or overnight.

Preheat oven to 350 degrees F. Shape dough into 1-inch balls. Roll in granulated sugar. Place 2 inches apart on ungreased baking sheets. Bake 8 to 12 minutes or until edges of cookies begin to brown. Let baked cookies rest on baking sheet for a few minutes before removing to wire racks to cool completely.

Store cookies in airtight container for up to 5 days.

Source: Culinary Concoctions by Peabody Pin It

Saturday, June 23, 2012

Classic Whoopie Pies


Whoopie pies have been on my to-do list for months now, they just never made it to the top of my priorities. Finally though, I had a full weekend to myself- no volunteer commitments, no school work to do, nothing to do but relax and do what I wanted! The weather was beautiful and hot, and I was able to make it out to the beach with some friends of mine, and out for food and drinks afterwards! And the second day was full of laundry, shoe-shopping, and Ribest with the boys. Funny thing is, I went out to Ribfest 2 days in a row now, and I don't even eat meat! It was a lovely weekend, and now unfortunately I'm back to the grind and heading into work today. Saturdays (my Mondays) suck.

These whoopie pies turned out pretty great, with only a few flaws. For one, mine do not look picture perfect. I don't have a cookie scoop, just a regular spoon, so what resulted was more oval-shaped cookies rather than round cookies. For two, I only had 2 left to photograph because I gave the rest away before I could. For three, it is unbelievably hot in my apartment. If I haven't said so before, I live in a small apartment where all the windows are facing the sun, all day long. I'm up on the 8th floor and only have 1 window that actually opens. Which means, when it's 45 degrees outside with humidity, it's 55 degrees in here. I have an small old AC, but running it on high all day long only takes the edge off and it ramps up my hydro bills big time. So all of that is to say that the icing was so soft due to the heat, that when I tried sandwiching them together, they kept sliding off. I had to strategically position them in various locations so that they would stay. Originally I thought it was a complete failure, but after a few hours the icing had firmed up a bit and managed to stay together.

These cookie sandwiches are yummm-y! Lots of chocolate flavour, light and fluffy as clouds, with a deliciously sweet filling. The cookies are like soft cake.... cake cookies! The recipe I took from Annie's Eats was enough to make 24 sandwich cookies, which I definitely didn't need. So I cut the recipe in half, but still ended up with 16 cookies that were huge!! I would have actually preferred the cookies to be a bit smaller, so if I were to do it next time, I could half the recipe and still likely get 18-20 sandwich cookies out of it. Keep that in mind!

Yield: about 16 sandwich cookies

Ingredients:
For the cookies:
1 3/4 cups all-purpose flour
1/2 tsp. salt
3/4 cup unsweetened cocoa powder
1/2 tbsp. baking soda
1/2 tsp. baking powder
1/2 cup (1 stick) unsalted butter, room temperature
1 cup sugar
1 large eggs
1 cup buttermilk, at room temperature
2 tsp. vanilla extract

For the filling:
1/2 cup (1 stick) unsalted butter, at room temperature
1 cup powdered sugar, sifted
Half of a 7½ oz. marshmallow fluff container
1 tsp. vanilla extract

Directions:
Preheat the oven to 400˚ F. Combine the flour, salt, cocoa powder, baking soda, and baking powder in a bowl and whisk together. Set aside. 

In the bowl of an electric mixer fitted with the paddle attachment, combine the butter and sugar. Beat together on medium-high speed until light and fluffy, 2-3 minutes. Beat in the egg until fully incorporated. Blend in the buttermilk and vanilla extract. Mix in the dry ingredients, blending just until combined.

Using a 1-oz dough scoop (or a spoon if you don't have one), drop the batter onto pans lined with parchment paper, about 12 cookies per pan. Bake for 10 minutes, rotating the pans halfway through baking. Allow to cool on the pan 5-10 minutes, then transfer to a wire rack to cool completely. Repeat with the remaining batter.

To make the filling, place the butter in the bowl of a mixer fitted with the paddle attachment. Beat on medium-high speed until smooth, 1-2 minutes. Blend in the confectioners’ sugar until incorporated. Beat in the marshmallow fluff and vanilla until light and fluffy, 2-3 minutes.

Once the cookies are completely cooled, match them up in pairs by size. Fill a pastry bag fitted with a plain tip (or if you don't have a plain tip, just leave it tip-less and it will work just as well) with the marshmallow filling. Pipe a dollop of marshmallow filling onto the flat side of one cookie of each pair, and sandwich the cookies together, pushing the filling to the edges. Store in an airtight container.

Source: Cookies and Filling from Martha Stewart (via Annie's Eats)

Pin It

Monday, May 14, 2012

Coconut Stuffed Chocolate Cake Cookies


Wow that is one pretty intense alliteration- Coconut Stuffed Chocolate Cake Cookies... what a mouthful! It was really for a lack of any better name. And is it just me, or does this picture oddly resemble a Christmas scene? Maybe it's just the red and the chocolate... it wasn't my intention to have it look like the holidays. What can I say, I'm no pro at photography or props and scenery. I'm very new at this still so most of the time I'm just going with what I think looks good. Sometimes it comes back to kick me in the butt, and often I've been able to correct it later in that day or the following day and try something new. Unfortunately I wasn't able to do that with this, as all of the cookies disappeared in pretty much a day and a half. A good handful went to work, a couple went to me and Sean (although I'm pretty sure I've eaten all but one of those), and the rest went to volunteering right away. It's not that I'm a super-giving person (although I do enjoy giving and it makes me happy), it's more so that if I keep all of these goodies around my house I WILL get fat. So shipping them off to somewhere else as soon as possible IS the answer.

I've been wanting to make these cookies for quite awhile now. I flagged this recipe from Confessions of a Cookbook Queen right when it came out. When I finally got around to making them, I realized that the cookies were made out of a cake box mix... I was very disappointed. I must admit I'm a bit of a self-professed food snob. I don't do box mixes; to me it feels like the cheap way out of things, and I can't say that I made the item from scratch. And let's face it- I like to take the credit for my work, not give it to a box mix. All the glory to me! 

These cookies were pretty good. I'm not going to say they were REALLY good, because they need just a slight bit of tweaking to get them there. While most of the people that tried them told me they were amazing, I felt that they lacked just a teeny bit of flavour. Not only that, but in a couple of the ones that I ate, I didn't get enough coconut, and the coconut is the best part. This all can be easily remedied I think.


These are the changes that I will make the next time I bake these up: I would replace 1/2 cup of the brown sugar with white sugar, add 1 more teaspoon of vanilla extract, and possibly add another 2-4 tablespoons of cocoa powder. I'd also use less dough for the actual cookie and try to flatten it out more, because the cookie- as it's a 'chocolate cake' cookie, bakes up quite a bit and is very fluffy, and so it was a bit too much cookie to coconut ratio. Also, I made way too much of the coconut filling, and put the remainder in the freezer to use for next time (I can't stand wasting food!) I've reflected the changes for that below. If you're making these you can use the original recipe or try with my additions, which I've starred beside the original ingredients.

Yield: approximately 3 dozen cookies

1/2 cup cocoa powder  *+ 2-4 tablespoons extra
3 cups all-purpose flour
1 teaspoon baking soda
1 teaspoon salt
1 cup (2 sticks) unsalted butter, softened
2 cups packed brown sugar  *1 1/2 cups packed brown sugar and 1/2 cup white sugar instead
2 eggs
2 teaspoons vanilla extract  *+ 1 teaspoon extra
3/4 cup milk

For the filling:
3/4 14-ounce can sweetened condensed milk
2 cups sweetened shredded coconut
(You may still have extra for this as I did not measure when I originally made it, and I'm guessing for how much you should use for less, as I had too much)

Directions:
Combine the condensed milk and coconut in a small sauce pan and heat over medium heat. Stir regularly to avoid burning until the mixture has thickened and begins to pull from the sides, approximately 10-12 minutes. Once this is done, transfer to a bowl and set in the freezer to cool for an hour.

In the meantime, preheat the oven to 350 degrees F and prepare the batter. Combine the cocoa powder, flour, baking soda and salt in a bowl and whisk until evenly combined. Combine the softened butter and sugars in the bowl of a stand-mixer and beat until light and fluffy, approximately 2-3 minutes. Mixing on low, add one egg until combined, and then add the other egg. Mix in the vanilla extract. Add half of the flour mixture, and beat until mostly combined. Stir in the milk, and then the remaining flour mixture. Allow the batter to stiffen in the fridge for 10 minutes.

Remove the batter and coconut mixture from the fridge and freezer and line baking sheets with parchment paper.


Scoop out approximately 1 teaspoon of batter and drop it on the baking sheet. Flatten the batter and create a well to drop the coconut into. I found it very helpful to dip a spoon into flour and flatten it with that, as the batter is very sticky. It's funny, you can see me in the reflection of the spoon if you look closely. Now what I'd like to note is that I would use less batter that you see here in this picture. Try to make them thinner too and make more of a well. The spoon works great for this.


 Add a scoop of coconut onto the cookie. I used approximately 1/2 - 1 teaspoon, but I wish I used more! Stuff in as much as you can :).


Add another scoop of cookie dough on top. This is where it gets tricky. Because the dough is so sticky, it's difficult to handle. Make sure you have that bowl of flour nearby, because you will need it. Try your best to flatten the dough as much as you can before plopping it on top. Seal the top piece with the bottom by pinching the top and bottom together.


Bake in the oven for 12-14 minutes. Let cool in the pan for 5 minutes, and then transfer the cookies to a cooling rack to cool completely.


Enjoy!

Source: adapted from Ann Arbor Pin It

Thursday, April 19, 2012

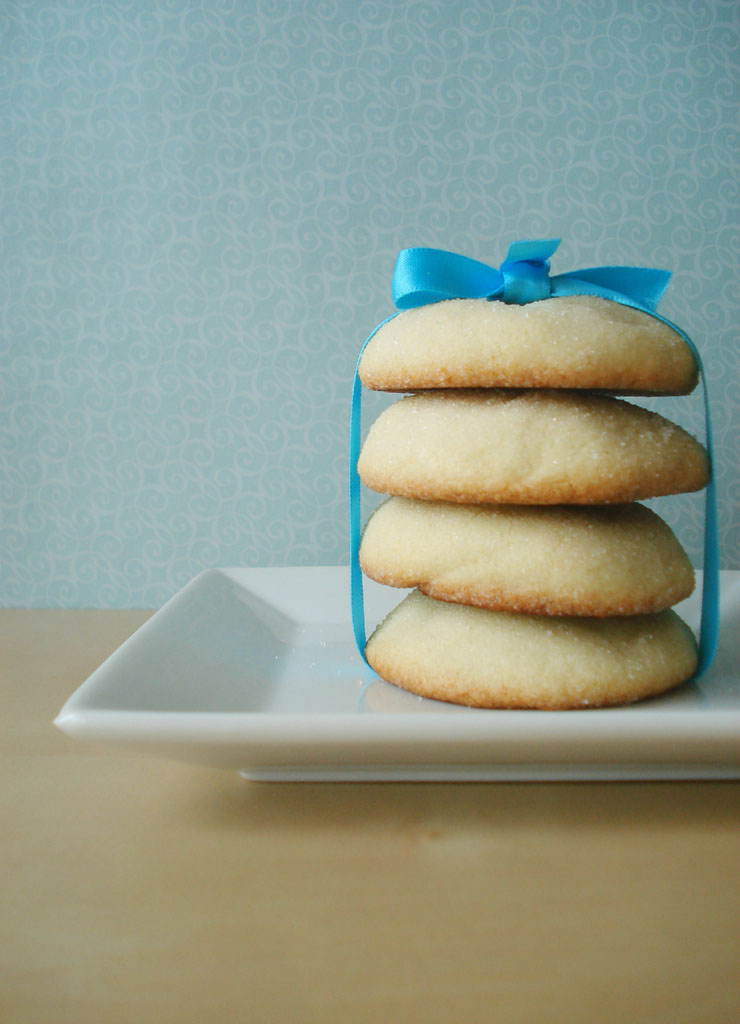
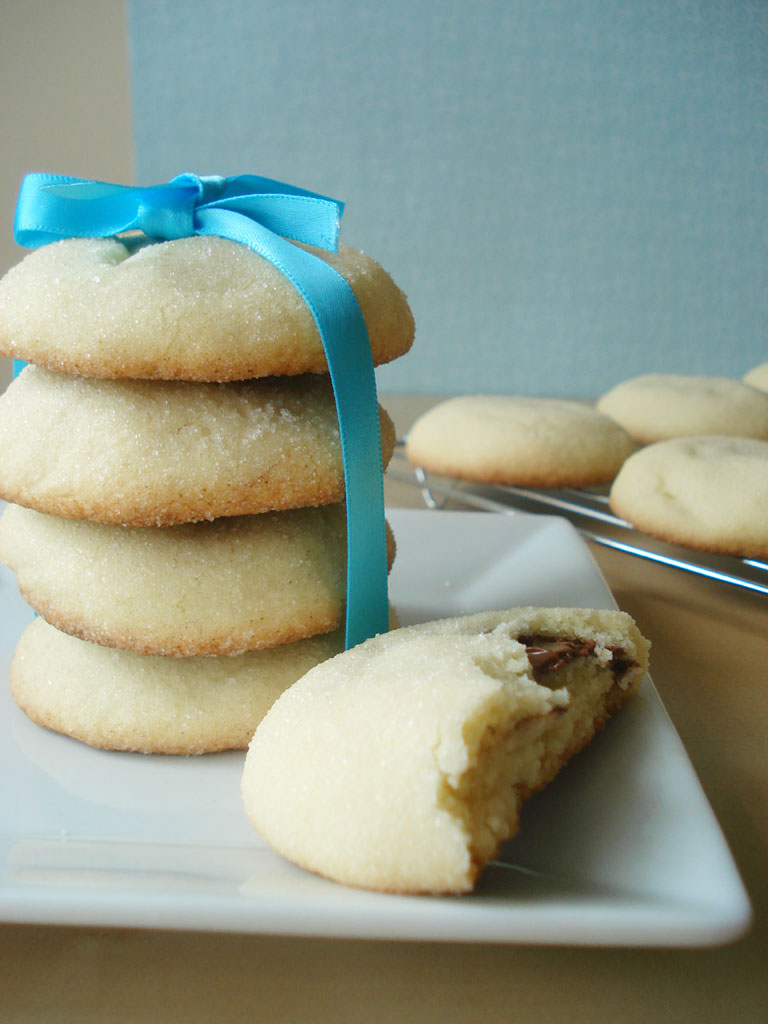
Nutella & Sea Salt Stuffed Sugar Cookie


Remember how I had said a few posts ago that things were going to be very busy for me for the month of April? They are. My life feels like a hurricane at the moment; the last 5 days I've been busy non-stop before going to work for 3-4 hours, and then after work for another 3-ish hours. The last few days have been filled with working on a secret project for my best friend's wedding shower (can't say what in case she reads this!). It was something that I thoroughly enjoyed doing, particularly because it's for my best friend. And because I live 6 hours away from her and can do very little, I jumped at the opportunity to help out.

Have you ever taken something on, only to find yourself literally seconds later saying 'that might not have been the best idea I've ever had...' That was me. I took a step back and looked at my month and thought 'uh oh... This could turn out very badly.' I was worried that it wouldn't get done, but it's all finished with time to spare! The only thing is, now I'm behind on school work. I know that I should be starting to write my one assignment today that is due in a week, because tomorrow I'm volunteering for 4 hours and then I have my cake decorating class... but I just have zero motivation. I totally need a purely veg day- but that's just not realistic. So I'm taking my relax time and mentally gearing up to work on my assignment in an hour or two.

Realistically, I know that won't work out the greatest, because I'm planning on cooking a nice meal tonight using red snapper, which I've never had before! If all turns out well, it could be in a future blog post. So if I think it out in my head, I would start school work 5:00, work for an hour or two, cook and eat dinner, and then maybe work for another hour. For me, that doesn't equal much success. Usually I need a good chunk of time to sit down and write a paper, it's how I work best. But in a busy life that doesn't always happen, so I guess you just gotta work with what you got!

As part of my vegging day, I finally got around to making a batch of cookies that I flagged months ago! They are really delicious, nothing less than what I expected. The cookie is made out of a soft and fluffy sugar cookie that has a Nutella filling with flecks of course sea salt in it. You get sweet and salty all in one  several bites (at least for me!), although I must admit the sugar is the stronger flavour. I may end up putting a few more specks of salt in them next time, but I was worried they would be TOO salty :).


Go ahead and make them! And eat one while it's still warm, that's when they're the best. Or two.. or three, go on, I won't tell.

Yield: Approximately 24 cookies

Ingredients:
1/2 cup Nutella (chocolate-hazelnut spread)
2 1/2 cups all-purpose flour
1/2 teaspoon baking powder
1/2 teaspoon salt
1 1/2 cups plus 1/3 cup granulated sugar, divided
14 tablespoons (1 3/4 sticks) unsalted butter, softened
2 large eggs
2 teaspoons vanilla extract
1 tablespoon sea salt

Instructions:
Using a 1 teaspoon measure, scoop out Nutella and place in small mounds on a cookie sheet lined with wax paper. Place in the freezer for 15 minutes.

Preheat the oven to 350 degrees F and line 2 large baking sheets with parchment paper.

In a medium bowl, whisk together flour, baking powder and salt.

In a mixing bowl, beat butter and 1 1/2 cups granulated sugar with an electric mixer on medium speed until the mixture is creamy and fluffy, 2-4 minutes. Beat in the eggs, one at a time, and the vanilla extract.

Turn the mixer to low speed and gradually beat in the flour mixture until it is just combined. Using a rubber spatula, stir the mixture a few times to make sure all the flour is incorporated. Use 2 tablespoons of cookie dough for each cookie. Split the piece of dough in half and slightly flatten both halves. Sprinkle 5 or 6 grains of sea salt on one half of the flattened dough.

Using a small metal spatula or knife, life the mounds of Nutella from the baking sheet and lay on the bottom half of the cookie dough, on top of the salt. If the Nutella starts to soften, place back in the freezer for a few minutes (I had to do this several times). Cover the Nutella with the other piece of cookie dough and seal the edges with your fingers. Roll the ball in the remaining 1/3 cup sugar to coat it and place it on a prepared baking sheet.

Repeat with the remaining dough, spacing the cookies about 2 inches apart from each other. Bake the cookies, one sheet at a time. They are done when the edges are set and beginning to brown, 10 to 13 minutes. The centres of the cookies should should still be soft and puffy.

Let the cookies cool on the baking sheet for 10 minutes, then move to a rack to cool. Serve them warm for an extra special experience!

Source: Cookin' Canuck


Pin It

Wednesday, March 14, 2012

Brown Butter Banana Bread Cookies


Anybody familiar with the phenomenon of slowly browning bananas? You know, the ones that have passed that 'perfect to eat' stage and as days pass they continue to sit on your counter and become more brown, until the point comes where you decide to either make something with them or give them the toss. That's almost  what happened to me here. 2 lonely bananas had just passed the perfect stage when I saw a post on Tracey's Culinary Adventures for Brown Butter Banana Bread Cookies, and I knew they'd have to be saved for this recipe. The name does give a perfect description of what these cookies are: soft and fluffy cookies that have a spiced banana bread flavour and texture, while being topped with a delicious brown butter frosting. If left sitting out, these cookies will be gobbled up in no time, unlike your poor brown bananas sitting in the corner :(.

This was my first try at browning butter, and I was a bit nervous. I'd never even seen it done before, and after my multiple failed attempts at caramel sauce, I was almost certain I would fail. What resulted was me hovering over the saucepan, my nose 2 inches from the butter (probably not a smart idea), trying to catch a waft of that unmistakable 'nutty' aroma that is supposed to occur when the butter has browned. In the midst of that, I was running back and forth to my laptop rereading the instructions over and over, to the point where I finally brought my laptop into my kitchen and started googling other instructions on how to brown butter. Can you say slightly neurotic and over-anxious? I can't defend myself... I'm not perfect in the kitchen and it kills me to have to throw out butter, having done it more times than I can count on various occasions.

Yield: About 2-3 dozen depending on the size
Ingredients:
2 cups all-purpose flour
1/4 teaspoon salt
1/2 teaspoon cinnamon
1/4 teaspoon nutmeg
1/4 teaspoon cloves
1/2 cup (1 stick) unsalted butter
1 cup sugar
1 large egg, at room temperature
1 cup mashed bananas (about 2 medium bananas)
1 teaspoon baking soda
1 teaspoon vanilla extract

Icing:
4 cups powdered sugar
10 tablespoons (1 1/4 sticks) unsalted butter
1/4 cup plus 1 tablespoon half-and-half (or evaporated milk)
2 teaspoons vanilla extract

Directions:

Preheat oven to 350 degrees F. Line baking sheets with parchment paper.

Whisk the flour, salt, cinnamon, nutmeg, and cloves together in a medium bowl. Add the butter to a medium skillet set over medium heat and let it start melting. Continue cooking, swirling the pan occasionally, until the butter becomes golden brown and smells nutty (be patient and watch carefully, it can go from brown to burnt quickly). Remove the skillet from the heat and pour the butter into the bowl of a stand mixer fitted with the paddle attachment. Allow the butter to cool for a few minutes. The butter will most likely have flecks of what you think is burnt butter. Don't worry about these.

Add the sugar to the mixer bowl and beat on medium for 1-2 minutes, or until well combined. Mix in the egg until completely incorporated. Combine the mashed bananas and baking soda in a medium bowl, then let sit for 2 minutes. Add the banana mixture and vanilla to the mixer bowl and beat until completely incorporated. Add the dry ingredients to the bowl in 3 additions, mixing until just combined before adding the next batch.

Use a small cookie scoop to drop balls of the dough (about 1 tablespoon each) onto the prepared baking sheet, leaving about 2 inches in between them. If you don't have a cookie scoop, like myself, simply use a spoon or even your hands if it's not too sticky. Make sure that you flatten the cookies down a bit- if not they will stay in the same original round shape, which is not what you want. Bake for 10-12 minutes or until the cookies are golden brown around the edges, and the centres spring back when lightly pressed. Transfer the baking sheet to a wire rack and let the cookies cool for a few minutes before removing them to the rack.

To make the icing: Add the powdered sugar to a large heatproof bowl. Put the butter in a small saucepan, set over medium heat and let it start melting. Use the same process as before to brown the butter. Once done, remove it from the heat and pour it over the powdered sugar, scraping the browned bits from the bottom of the pan as well. Add the half-and-half and vanilla and stir until the icing is smooth. If you don't have half-and-half, a slightly lesser amount of milk will do. I had heavy cream and milk, so made a mixture of the two. Using a spatula or knife, spread icing on each cookie. If the icing stiffens up too much before all of the cookies are frosted, add a little more cream to lighten it up.

Store the cookies in an airtight container at room temperature.

Source: slightly adapted from Tracey's Culinary Adventures, (who slightly adapted from Iowa Girl Eats, who adapted from Simply Recipes) Brown Butter Icing from Martha Stewart's Cookies


Pin It

Saturday, February 11, 2012

Valentine's Day Sugar Cookies


Having made sugar cookies with royal icing for the first time at Christmas, I was eager for an opportunity to try them again. There's something special about these cookies; they allow for SO much creativity! And if you don't mind spending the time it takes to make them, they can be a lot of fun and incredibly rewarding when you see the finished product. Especially when all your friends comment on how amazing they are ;). The problem was, I couldn't decide what to make. I had seen so many ideas on different blogs, so I settled on 2 different batches to make. The first is the one seen above: classic vanilla sugar cookies decorated as conversation sweet hearts. The second is seen below: a more romantic valentine's day chocolate sugar cookie.


This was also my first time using the 'wet-on-wet' technique- more on that later. One of my favourites was the lips cookie that have S.W.A.K. on them- Sealed With a Kiss!! Love it.

Let's start with the conversation heart cookies first. You can refer to my directions in this post: Baby Shower Cookies. In that post I used almond extract, which I prefer to vanilla. Use whichever according to your own preference, but I find that the almond gives it a more unique taste, and I've found through the feedback of eager tasters that the almond is the preferred flavour.


Onto the chocolate sugar cookies. With the royal icing on these, they tasted like a firmer oreo cookie. I can't decide which I prefer- vanilla or chocolate! What I will say is that the chocolate cookie dough is not nearly as nice to handle as the vanilla. It was a bit crumbly and difficult to work with, which resulted in me throwing out more than I normally would have at the end. I think in the future I will try a different recipe to hopefully get something a little more moist. Nonetheless, the final product was yummy. Give them away as Valentine's Day treats or enjoy them yourself, I won't judge!


Ingredients:

2 & 1/2 c. all-purpose, unbleached flour
1/2 c. dutch-process cocoa (I don't have dutch-process, and so just use normal cocoa powder)
1/2 tsp. coarse salt
1 c. unsalted butter
1 c. sugar
1 egg
1 tsp. vanilla

Preheat oven to 350. Line baking sheets with parchment paper.

Whisk together the flour,cocoa, espresso powder and salt; set aside. Cream together the butter and sugar until light an fluffy. Beat in the egg and vanilla until well combined. In 3 additions, add the flour mixture at low speed. Scrape down sides and bottom of bowl as needed.

Roll the dough on a lightly floured and cocoa-ed surface. (I mixed the 2 of these, then spread on my rolling surface, on my rolling pin, and used it to dip my cookie cutters.)

I put my baking sheets into the freezer for about 8 minutes before going into the oven to help prevent spreading. It works out quite well- when 1 pan is in the oven, another is in the freezer, while another is what I'm currently working on. Every 8-10 minutes or so (how long it takes to bake the cookies) all the pans get rotated.

Bake 8 minutes. Let cool completely before moving onto icing.
Source: adapted from Bake at 350

You can find my recipe for royal icing in this post: Baby Shower Cookies Pin It