Thursday, September 19, 2013

Hummingbird Cake


Somehow, this beautiful cake became lost in the mounds of pictures I have. If memory serves me correctly, I made this cake for Mother's Day, months ago! It's a shame I forgot about it, because it was truly a delicious cake. For those of you who are unfamiliar with Hummingbird cakes, they are filled with banana and pecan chunks, moistened with crushed pineapple, and tasting lightly of cinnamon spice. Topped with a whipped cream cheese frosting, and we're talking scrump-diddly-umptious. Yes that is a word.


I think that although this cake made a wonderful dessert for late spring/early summer, it would make an equally amazing dessert for the fall. Due to the density of the cake and the warm spices included, it could easily fit into the fall season. It reminded me of Apple Caramel Cake that I made last Thanksgiving for my birthday, which I had decided was my favourite cake to the date. Although I don't think this Hummingbird cake topped it, it's sidled right up behind it! I particularly like this version of cream cheese frosting, because with the whipped cream it makes it much lighter and not as sweet- sometimes with cream cheese frosting the sugar level starts to burn the back of my throat. Too much info? Oops... well, did I mention the whole thing is super easy and quick to make??

Ingredients:
3 cups all purpose flour
1 teaspoon baking soda
1/2 teaspoon salt
2 cups sugar
1 teaspoon cinnamon
3 eggs, lightly beaten
1 cup vegetable oil
2 teaspoons vanilla
8 oz. can crushed pineapple, liquid included
2 cups diced ripe bananas
2 cups pecans, chopped and toasted

Frosting:
16 oz. cream cheese, room temperature
1 1/2 cup powdered sugar
1 teaspoon vanilla
1 cup heavy cream, cold

Directions:
Preheat oven to 350 degrees F and grease and flour 3 9-inch cake pans.

Prepare toasted pecans: chop pecans in small pieces and place on a parchment covered baking sheet. Bake for 5 minutes, watching them so that they do not burn. Set aside and let cool.

Whisk together flour, soda, salt, sugar and cinnamon in large bowl. Add lightly beaten eggs, oil and vanilla to the dry ingredients and stir until combined. Add crushed pineapple (liquid as well) and cut up bananas, and stir until combined. Finally stir in 1 cup of chopped toasted pecans. Reserve the rest of the pecans to sprinkle on top of the cake if desired.

Spread batter evenly among cake pans and bake for 22-25 minutes or until a toothpick inserted comes out clean. Remove and let cool on a cooling rack.

For the frosting: beat the cream cheese, sugar and vanilla until smooth and fluffy. In a separate bowl, beat the heavy cream to nearly stiff peaks, then add the whipped cream into the cheese mixture and quickly and briefly beat to combine. Do not over beat.

To assemble the cake: gently level the cake layers using a large serrated knife to remove any mounded tops. Place first layer cut side down and spread frosting on top with an offset spatula. Continue with the remaining two layers and then frost the sides. Sprinkle with remaining pecans, if desired. Store in fridge.

Source: cake from Bakerella, who adapted from Southern Living.com; frosting from Not So Humble Pie. Pin It

Wednesday, September 4, 2013

Cookies, cookies and more cookies.


So, if you've followed my blog for some time now, you might have noticed that I haven't posted any sugar cookies since Easter. That's not because I haven't been making them; I have actually, although not in gross quantities, but because it felt almost pointless to share them on my blog here. The reason I say that is because I almost always use the same recipe and refer back to one of my original posts for it, and there's not much else that I can say about them. Unlike some of the cookie gurus who post tutorials on how to decorate different cookie designs (Callye from SweetSugarBelle, Marian from Sweetopia, Georganne from Lilaloa), I could never have the time or patience for the amount of work that requires.

So I'm going to share a few pictures of the different creations I've produced over the past several months, and hope that you enjoy!


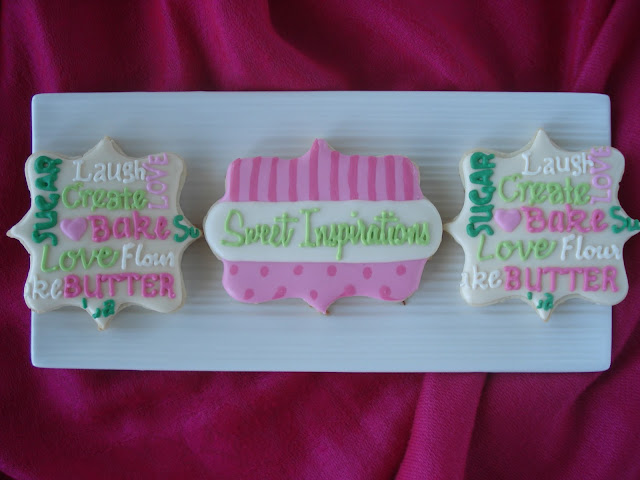
I should also perhaps mention at this time that this past year I've started up my own little side business- nothing serious, just a part-time hobby endeavour. I mostly bake cookies for different holidays and events like baby and bridal showers, anniversaries, bachelorette parties, etc., and occasionally bake cupcakes and cakes. I love that I'm able to create goodies to share with others, particularly when I see their eyes light up and tell me how fab something looks or how good it tastes. It truly makes my day! And if you haven't already guessed, my little business name is Sweet Inspirations and I have a facebook page dedicated solely to it at: www.facebook.com/mlsweettreats.


Here are a few Mother's Day bouquets that I made- I had over a dozen orders for them! I think they were a big hit :).


Each bouquet was a little different, and a few were even customized!


A custom bouquet: this customer's mother enjoyed walking, gardening (water can), cooking (pot and spoon), and crafting/scrapbooking (scissors, glue, painting).


A bridal shower order earlier this summer. The customer gave me complete freedom to create whatever I wanted to! A little nerve-wracking, but I loved the results!


A wedding celebration of sorts order. I absolutely loved creating this set, because it was so personal! The mother of the bride contacted me and explained that she was having a BBQ in celebration of the return of her daughter from China. While in China, her daughter had gotten married. The mother explained that she wasn't a typical bride; she has a ruby engagement ring and wore a traditional red Chinese wedding dress.


Cherry blossoms and symbols standing for 'double happiness' and 'love'. I have to say, this font was by far the most time-consuming and labour-intensive font I have ever attempted. Each letter had to be drawn out to a point with a tooth-pick. It took forever! But the result was worth it.


This was my latest order, from a very good friend of mine who is helping to throw a baby shower for twin girls! The set was designed to match the invites, and I have to say, I love the simplicity of them! I was so excited to make these for my friend.


Well that's it for now! I think in a few months I will do a similar post. In the meantime, if you'd like to see some of the work I do (including some cakes and cupcakes that I don't post on here), please feel free to check out my facebook page (www.facebook.com/mlsweettreats). Pin It